Tired of printing and scanning just to sign a PDF? You don’t have to anymore. With FacePdf, you can sign your PDF online in minutes – no printer, scanner, or fax machine needed.
If someone sends you a PDF to sign, you don’t need to print, scan, or fax it. With FacePdf, you can add your signature directly to a PDF file online – in just a few steps. It’s fast, secure, and works on any device.
Here’s how to do it:
🧩 Step 1: Open FacePdf in Your Browser
Go toFacePdf.com using Chrome, Safari, Firefox, or any modern browser.
No software installation is required – everything happens in the cloud.
You’ll land on the main screen where you can begin uploading your PDF.
✍️ Step 2: Select the “Sign” Tool
· Click the “Sign” button in the top toolbar to activate the signature tool.
· This lets you insert your digital signature anywhere in the document.
📂 Step 3: Upload Your PDF
Click the “Upload PDF” or “Choose File” button.
Select the PDF file from your computer, tablet, or phone.
💡 FacePdf supports all standard PDF formats.
🛠 Step 4: Create Your Digital Signature
FacePdf gives you two simple options to create your signature:
Option 1: Draw Your Signature
Use your mouse, stylus, or touchscreen to draw your signature on a blank screen.
After Click You get Blank screen Like
Here You can create you signature via mouse or keyboard.
Once you’re satisfied, click “Done” to save it.
Option 2: Upload a Signature Image
· Upload an image – if you already have a photo of your real signature.
Once you’re done, click “Insert”.
📍 Step 5: Place and Adjust the Signature
· Click on the spot in the PDF where your signature should appear.
· Drag and resize it to fit neatly in the signature field
· You can also add date, initials, or text notes using the editing tools.
💾 Step 6: Download or Share the Signed PDF
When you’re done, click “Download” or “Save” to get your signed document.
You can also email it directly from FacePdf or upload it to Google Drive, Dropbox, or other cloud services.
🔐 Is FacePdf Secure?
Yes. FacePdf uses secure HTTPS encryption. Your PDF is processed instantly in your browser, and files are not stored after you finish.
📱 Works on Mobile Too
FacePdf is fully compatible with mobile devices. You can upload, sign, and send documents from your phone no app needed.
✅ Why FacePdf is best?
No printing or scanning
Fast and intuitive interface
Works on any device
Free to use
Secure and private
Stop printing just to sign. Use FacePdf to sign any PDF online – fast, safe, and paperless.
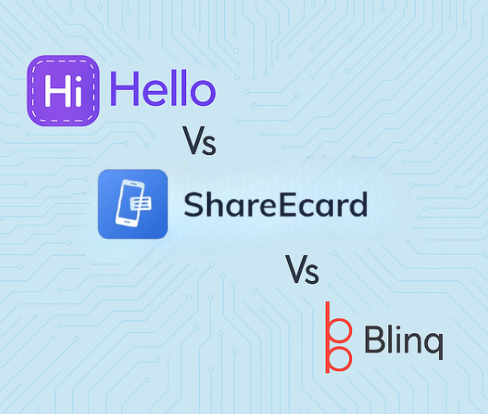
In a world where connections are everything, digital business cards have become must-haves. They’re efficient, eco-friendly, and often plug right into your daily workflows. Whether you’re networking solo or scaling connections across a global team, platforms like ShareEcard, HiHello, and Blinq are leading the charge.
Each offers a different strength – from sleek design and CRM integrations to team-level control and branding precision. Let’s take a closer look at how they compare and which might be the best fit for your needs.
🔍 Platform Snapshot
1. ShareEcard
Purpose-built for teams and enterprises, ShareEcard brings powerful administrative tools and brand consistency to digital networking. It’s especially valuable for organizations seeking control, compliance, and scalability.
Founded: 2019
Best for: B2B teams, multinationals, enterprise sales, business professionals
Platforms: iOS, Android, Web
2. HiHello
HiHello offers a polished, modern take on business cards with rich customization and robust CRM features, great for individuals and collaborative teams.
Founded: 2018
Best for: Professionals, SMBs, enterprise sales
Platforms: iOS, Android, Web
3. Blinq
Blinq focuses on speed and simplicity. It’s ideal for users who want quick sharing and solid NFC capabilities with minimal setup.
Founded: 2017
Best for: Startups, solo users, quick-sharing teams
Platforms: iOS, Android, Web, Apple Watch
⚙️ Feature Overview
Feature
ShareEcard
HiHello
Blinq
Card Customization
High (brand control)
High (themes, templates)
Moderate
Team Management
✔️ Advanced admin panel
✔️ Directory & roles
✔️ Admin console
CRM Integration
Salesforce, Zoho
Salesforce, HubSpot
Salesforce, Zapier
QR Sharing
✔️
✔️
✔️
Email Signature
✔️
✔️
✔️
NFC Support
Limited (optional)
Yes (HiHello NFC)
Yes (Blinq NFC)
Analytics
Team-wide insights
Detailed user analytics
Real-time data
Integrations
Moderate
Extensive
Moderate
Contact Sync
Outlook, CSV
Gmail, iCloud, Outlook
Google, Apple
White Label
✔️
Enterprise tiers
Business tier
Offline Sharing
✔️
✔️
✔️
Pricing
From $20/user/year
From $72/user/year
From $36/user/year
🖥️ 1. User Experience & Interface
HiHello delivers an elegant, highly visual experience that’s great for creative professionals.
Blinq keeps it clean and quick—perfect for minimalists on the go.
ShareEcard leans into functionality, offering an enterprise-grade interface designed for scalability and efficiency. It may not be flashy, but it’s purpose-built and reliable for managing large teams.
🏆 Winner: HiHello – Sleekest overall UI, though ShareEcard wins in enterprise usability.
🎨 2. Customization & Branding
ShareEcard shines when it comes to branding at scale. Admins can enforce templates and ensure brand consistency across hundreds (or thousands) of cards—ideal for keeping everyone on-message.
HiHello offers fun, flexible customization for personal flair.
Blinq covers the basics but lacks deep design tools.
🏆 Winner: Tie – ShareEcard for organizational branding; HiHello for personal expression.
📲 3. Sharing Flexibility
All three offer:
QR code & link sharing
Wallet card support (Apple/Google)
Email signature embeds
Notable Extras:
ShareEcard: Streamlined team-wide sharing tools and email signature automation.
HiHello: Smart NFC cards with dynamic syncing.
Blinq: Apple Watch app for instant access.
🏆 Winner: Blinq for ease, with ShareEcard close behind for its enterprise-wide sharing controls.
🧑💼 4. Enterprise & Team Tools
This is where ShareEcard truly shines. Built from the ground up for businesses, it includes advanced team management, SSO, permission roles, and centralized analytics—all designed to help admins maintain control without micromanaging.
HiHello provides solid tools with more flexibility for growing teams.
Blinq includes essential admin functions, but lacks depth for enterprise use.
🏆 Winner: ShareEcard – Hands down the most enterprise-ready.
🔌 5. Integrations & CRM
HiHello leads for CRM depth—connecting with Salesforce, HubSpot, and Google Workspace out of the box.
ShareEcard supports CRM staples like Salesforce and Zoho, with added options for Microsoft Teams and Workspace.
Blinq connects via Zapier, Slack, and Salesforce.
🏆 Winner: Both HiHello and Blinq, but ShareEcard still offers solid integration for core business tools.
📊 6. Analytics
ShareEcard provides team-level analytics and performance tracking – perfect for organizations measuring networking ROI.
HiHello focuses on individual-level insights with detailed engagement tracking.
Blinq includes location-aware stats and real-time notifications.
🏆 Winner: HiHello for individuals, ShareEcard for team-wide visibility.
📡 7. NFC & Offline Options
HiHello and Blinq offer NFC card options with real-time sync.
ShareEcard supports NFC through third-party cards – suitable for teams looking to customize or scale on their own terms.
🏆 Winner: HiHello, but ShareEcard still gets the job done for offline and custom NFC needs.
💰 Pricing Snapshot (2024)
Platform
Free Plan
Paid Plan Start
Enterprise Tier
ShareEcard
✔️
$20/user/year
Custom plans and flexibility
HiHello
✔️
$72/user/year
Pro + CRM branding
Blinq
✔️
$36/user/year
Team and business plans
🏆 Winner: ShareEcard for price and best value, Blinq for more CRM options.
✅ Final Verdict
Need
Best Platform
Enterprise-level tools & branding
ShareEcard
Custom design & branding
HiHello
Fast sharing & CRM options
Blinq
CRM-focused teams
HiHello
Company-wide control
ShareEcard
💬 Final Thoughts
Digital Business Cards are more than just a smart alternative to print – they’re powerful tools for managing relationships, growing your brand, and scaling your team’s networking to impact the sales process.
ShareEcard is a fantastic choice if you’re looking for enterprise-ready features, brand control, and a secure, centralized admin experience with a reduced Budget. HiHello is perfect for professionals who want beauty and brains in their cards. And Blinq is ideal for quick setup and smart sharing with more CRM Integrations options.
Whichever you choose, you’re stepping into a more modern, efficient way to connect.
In today’s rapidly evolving digital landscape, information has become the most valuable asset—one that is increasingly vulnerable to cyber threats. As we move deeper into a tech-driven era, ensuring the security of our documents is no longer optional; it’s essential. From financial statements and legal agreements to personal IDs and medical records, PDFs are the standard format for transmitting critical data. However, with cybercriminals becoming more sophisticated, the seemingly harmless act of attaching a PDF to an email exposes sensitive information to potential breaches, leaving your digital vault dangerously unguarded.
🔒 Why PDF Protection Matters
PDFs are popular for a reason – they preserve formatting, support encryption, and are easily shared. But here’s the catch: without protection, PDFs can be opened, copied, altered, or forwarded by anyone who gets their hands on them.
Here’s why that’s a big deal:
Data Breaches Cost Money and Trust: If a sensitive PDF is leaked – whether it’s an NDA, client list, or business proposal – it could result in reputational damage, regulatory fines, or lawsuits.
Easy to Alter, Hard to Detect: Unsigned PDFs can be modified without your knowledge. Someone could alter terms in a contract or tamper with figures in a report.
Unauthorized Sharing is Common: One click is all it takes for someone to forward a sensitive document. Without restrictions, you lose control of where that file goes next.
Bottom line: Treat every PDF like a locked briefcase – unless you want it in the wild, secure it properly.
🔐 1. Encrypt Your PDF with a Strong Password
Encryption scrambles your document so only those with the right password can open it. It’s your first and most essential layer of defense.
✅ Why This Matters:
Prevents unauthorized access if the file is intercepted.
Ensures only trusted recipients can read the contents.
🔧 How to Encrypt:
With Adobe Acrobat:
Open the file > File > Protect Using Password.
Select to restrict viewing or editing.
Set a strong, unique password.
With Microsoft Word (Before Saving as PDF):
File > Info > Protect Document > Encrypt with Password.
Save as PDF after setting the password.
Online Encryption (Use Carefully):
facepdf.com: Advanced password protection and encryption for secure access. Protect Your PDF
Tools like Smallpdf and PDF24 offer password features but be cautious with confidential info.
✍️ 2. Use Digital Signatures to Prove Authenticity
A digital signature acts like a virtual seal – it proves who signed the document and confirms that no one has altered it since.
✅ Why This Matters:
Verifies the sender’s identity.
Prevents post-signature tampering.
Adds legal weight to agreements in many jurisdictions.
🔧 How to Sign:
Adobe Acrobat:
Tools > Certificates > Digitally Sign.
Follow prompts to use an existing digital ID or create one.
Other Platforms:
DocuSign, HelloSign, and facepdf.com allow seamless digital signatures with secure delivery options.
🚫 5. Restrict Actions with Permissions and Access Controls
Even if someone opens the file, you can limit what they can do with it.
✅ Why This Matters:
Blocks copying, printing, or editing the document.
Maintains confidentiality even if the file is shared.
🔧 How to Set Permissions:
Adobe Acrobat:
File > Protect Using Password > Restrict Editing and Printing.
Set a permissions password.
facepdf.com: Advanced permission controls let you:
Set expiration dates.
Restrict forwarding or downloading.
Control access on a per-user basis.
🛡️ 6. Keep Your Security Tools Updated
Your defenses are only as strong as your tools.
✅ Best Practices:
Update your PDF software (Adobe, Foxit, etc.) regularly.
Keep antivirus and anti-malware tools up to date.
Use a VPN when sharing files on public Wi-Fi or unsecured networks.
👤 7. Verify Who You’re Sending To
Before hitting “send,” double-check who’s on the receiving end.
✅ How to Avoid Mistakes:
Confirm recipient emails and phone numbers manually.
Use multi-factor authentication (MFA) when available.
For cloud shares, restrict to specific emails or accounts.
facepdf.com offers recipient-based authentication, like one-time passcodes or email verification.
✅ Don’t Just Send PDFs – Protect Them
Securing your PDF files isn’t just about locking them with a password. It’s about building a complete wall of protection: encryption, access controls, verified signatures, secure sharing, and smart handling.
Think of your PDF like a valuable asset. Would you mail cash without an envelope? Then don’t share sensitive files without protection.
Take the time to lock down your PDFs and ensure that only the right eyes see them – and that they can’t be tampered with or misused.
🔧 About facePdf.com
facepdf.com is your all-in-one platform for secure PDF management. Whether you need to:
Encrypt with strong passwords
Digitally sign important docs
Share securely with restricted access
Watermark files for tracking
Set view-only or time-limited permissions
…facePdf has the tools to protect your documents with confidence. If you are serious about document security, this platform makes it easy and effective – without needing to be a tech expert.
Jupyter Notebook is a vital tool for data scientists, educators, and developers. It enables users to write and execute Python code, visualize data, and document the process all in one place. However, when it comes time to present or share your work, especially in academic or professional settings, a polished PDF version is often preferred. This guide provides a step-by-step breakdown of various methods to export Jupyter Notebooks to PDF, complete with visuals and troubleshooting suggestions.
Why Export to PDF?
PDFs are universally accessible and preserve formatting across devices. Whether you’re submitting a homework assignment, including analysis in a report, or simply archiving your project, exporting to PDF ensures your content remains intact and readable.
Method 1: Built-in PDF Export via LaTeX
Jupyter Notebook provides a straightforward method to export directly to PDF, but it does rely on a LaTeX installation.
Step-by-Step Instructions:
Step 1: Launch Jupyter Notebook
Open your terminal or Anaconda Prompt.
Enter:
jupyter notebook
This will launch the Jupyter interface in your default web browser.
Step 2: Open Your Notebook
Navigate through the Jupyter file explorer.
Click on the .ipynb file you want to export.
Step 3: Export as PDF via LaTeX
Click on the File menu in the top toolbar.
Select Download as > PDF via LaTeX (.pdf).
Step 4: Save the PDF
Jupyter will generate the PDF and prompt you to save or download it. If LaTeX is not configured correctly, an error message will appear instead.
nbconvert is a Jupyter utility that converts notebooks into different formats, including PDF, HTML, Markdown, and slides.
Step-by-Step Instructions:
Step 1: Install nbconvert
Make sure nbconvert is installed:
pip install nbconvert
Step 2: Install LaTeX
Install a LaTeX distribution based on your OS as previously outlined.
Step 3: Use nbconvert to Export PDF
Navigate to the folder containing your notebook:
cd /path/to/notebook
Then convert it:
jupyter nbconvert –to pdf my_notebook.ipynb
This command creates my_notebook.pdf in the current directory.
Advantages:
Enables automation with scripts.
Supports batch processing.
Common Errors and Solutions:
Error: “xelatex not found on PATH”
Ensure your LaTeX distribution’s binary folder is added to your system’s environment variables.
Error: PDF creation failed
LaTeX packages may be missing. Installing texlive-full on Linux often resolves this.
Method 3: Export as HTML and Print to PDF
This method is ideal for users who want a quick export option without dealing with LaTeX.
Step-by-Step Instructions:
Step 1: Export Notebook as HTML
In Jupyter Notebook, go to File > Download As > HTML (.html).
Step 2: Open the HTML File
Use any web browser to open the file.
Step 3: Print to PDF
Use the browser print function (Ctrl + P or Cmd + P).
Set destination as “Save as PDF” and click Save.
Pros:
No LaTeX installation required.
Faster and simpler for basic formatting.
Cons:
Less control over layout and styling.
Code blocks may wrap poorly depending on the browser.
Method 4: Use Online Converters
Online converters provide a fast and efficient way to generate PDF files from Jupyter Notebooks. These platforms are convenient, easy to use, and do not require any installation.
Recommended Tools:
FacePdf – Offers a complete suite of tools beyond simple conversion. You can upload .ipynb-converted HTML or PDF files to merge, compress, watermark, or even convert them into other formats like Word or PowerPoint.
Vertopal – A user-friendly interface that supports .ipynb file conversion to PDF with minimal effort.
Online2PDF – Great for combining multiple formats and adjusting settings before final export.
These platforms are ideal for users seeking quick, browser-based solutions for document conversion and enhancement.
Method 5: Jupyter Extensions (PDF via HTML)
Extensions like notebook-as-pdf provide alternative export formats using a headless browser to render your notebook.
Installation:
pip install notebook-as-pdf
pyppeteer-install
Usage:
Open your notebook.
Navigate to File > Download As > PDF via HTML.
Benefits:
Avoids LaTeX entirely.
Maintains notebook layout more accurately.
Enhancing PDFs with FacePdf
Once you’ve exported your PDF, you might want to enhance it for sharing or presentation. FacePdf is an online tool that offers PDF editing and optimization capabilities.
Key Features:
Convert PDFs into Word, Excel, PowerPoint, images.
Edit text, add annotations, or highlight code.
Merge/Split PDFs to customize document flow.
Compress to reduce file size.
Secure with password encryption or access restrictions.
Why Choose FacePdf?
Web-based: No installation needed.
Supports drag-and-drop files.
Created in Switzerland: Ensures international standards and privacy compliance.
Troubleshooting and Tips
Problem 1: PDF export fails with nbconvert.
Fix: Run the command with –log-level=DEBUG to see where it’s failing.
Problem 2: LaTeX is installed, but still getting errors.
Fix: Check if LaTeX binaries (like xelatex) are in your system PATH. Reboot if needed.
Problem 3: Output PDF has broken formatting.
Fix: Consider switching to the HTML-to-PDF method or using –template option in nbconvert to apply custom styles.
Exporting Jupyter Notebooks to PDF is an essential step in professional and academic reporting. Whether you use Jupyter’s built-in tools, command-line utilities, or browser-based methods, each approach has its advantages based on your goals and technical environment. With tools like FacePdf, your exported documents can be further enhanced, ensuring they are visually polished and easy to distribute.
By understanding each method and how to troubleshoot issues, you can confidently produce well-formatted, shareable PDF documents from your Jupyter Notebooks.
An information technology school opens doors to one of the fastest-growing industries in the world. Technology is embedded in every aspect of life, from the way we communicate to how businesses operate. Whether you dream of coding cutting-edge software, securing networks, or managing complex IT infrastructures, this field is brimming with opportunities.
The demand for skilled IT professionals has skyrocketed in the past decade. Businesses, healthcare institutions, government agencies, and even creative industries rely on technology to function efficiently. As a result, those with specialized training are in high demand.
Why IT is the Future
Technology is evolving at an unprecedented pace. Artificial intelligence, cloud computing, and cybersecurity are no longer buzzwords—they are necessities in today’s workforce. Employers seek tech-savvy individuals who understand how to implement, manage, and innovate with these tools.
That’s where an information technology school comes into play. It bridges the gap between ambition and expertise, providing hands-on training and real-world problem-solving skills. A structured curriculum ensures that students graduate with not just theoretical knowledge but also practical experience.
Getting Started with the Right Training
One of the biggest challenges in the tech world is staying ahead of the curve. Unlike traditional fields, where a degree might last a lifetime, IT demands continuous learning. Choosing the rightinformation technology school can set you up for success by offering a curriculum that keeps pace with industry trends.
Look for a program that includes:
Hands-on coding experience
Cybersecurity best practices
Cloud infrastructure management
Data analytics and machine learning fundamentals
Practical training and certifications can significantly boost job prospects. Many institutions now integrate certification prep into their coursework, making graduates job-ready immediately.
Real-Life Success Stories
Take Mike, for example. After spending years in retail management, he realized his passion lay in technology. He enrolled in an IT program, mastered networking, and landed a job as a cybersecurity analyst within a year. His transition wasn’t just about job security; it was about doing something he genuinely enjoyed.
Or consider Sarah, who always had a knack for problem-solving but didn’t know how to turn it into a career. An IT school introduced her to software development, and today, she’s building applications that impact thousands of users daily. Her journey wasn’t linear, but with the right guidance, she found a rewarding career.
Career Paths in IT
The beauty of the tech industry is its versatility. Whether you love working with numbers, designing user interfaces, or protecting networks from cyber threats, there’s a path for you. Some of the most sought-after roles include:
Software Developer – Creating innovative applications and programs
Network Administrator – Managing and securing computer networks
Cybersecurity Specialist – Protecting organizations from cyberattacks
Cloud Engineer – Optimizing and maintaining cloud-based solutions
Data Analyst – Interpreting complex datasets to drive business decisions
What Employers Look For
A degree is valuable, but what really makes a candidate stand out? Employers prioritize:
Certifications: IT certifications like CompTIA, Cisco, and AWS are highly regarded.
Problem-Solving Skills: The ability to troubleshoot and think critically.
Hands-On Experience: Internships, projects, and freelance work demonstrate real-world expertise.
Adaptability: The willingness to keep learning in an ever-changing field.
The Next Steps
Enrolling in an information technology school is the first step toward a rewarding career. Whether you’re a high school graduate, a career changer, or simply looking to upgrade your skills, the tech industry offers endless possibilities. The key is to start with a strong foundation, gain hands-on experience, and stay curious.
The digital revolution isn’t slowing down. Are you ready to be a part of it?
In today’s digital world, data privacy and document protection are more critical than ever. Whether you’re handling sensitive business agreements, personal identification, or confidential project files, sharing unprotected PDFs can leave your information exposed and vulnerable.
This is where FacePdf steps in—a simple yet powerful tool that enables users to encrypt and password-protect their PDF files within seconds, without requiring any downloads or technical expertise.
Let’s explore why password protection is important, how FacePdf works, and how you can get started securing your files right away.
Why You Should Password Protect PDF Files
Sharing PDF files is common in both professional and personal contexts. However, most people don’t realize just how easily those files can be misused if they aren’t protected. Here are some reasons why you should consider password-protecting your PDFs:
1. Prevent Unauthorized Access
If your PDF includes confidential data—whether it’s a contract, a medical report, or financial information—you don’t want just anyone accessing it. Password protection ensures only authorized individuals can open the document.
2. Control Editing and Sharing
Without protection, PDFs can be altered, copied, or printed by anyone who receives them. FacePdf allows you to set specific permissions, preventing unauthorized modifications or duplication.
3. Maintain Professional Integrity
When working with clients, legal partners, or stakeholders, presenting a secure document communicates professionalism and care. It also helps meet compliance requirements in regulated industries.
What Makes FacePdf a Reliable Choice?
There are plenty of tools available for editing PDFs, but few prioritize security in the way FacePdf does. Here’s a breakdown of the features that make it stand out:
Key Features of FacePdf
Feature
Description
Password Protection
Set a custom password to prevent unauthorized access.
AES Encryption
Uses industry-standard encryption for maximum file security.
Permission Controls
Restrict printing, copying, and editing—even after the file is opened.
Web-Based Platform
No installation required; works from any browser or device.
Automatic File Deletion
Files are deleted from servers after processing to ensure privacy.
Watermarking
Optional feature to mark sensitive files with visible ownership or warnings.
These features ensure that your documents are not only protected but also handled with maximum efficiency and privacy.
Step-by-Step: How to Password Protect Your PDF with FacePdf
FacePdf has been designed with user-friendliness in mind. You don’t need any special software or technical skills. Just follow these steps:
1. Upload Your PDF File Head over to the FacePdf website and upload the file you want to lock. Just drag, drop, and you’re ready to go.
2. Select “Password Protect” Choose the Password Protect tool from the list of options. It’s clearly labeled and super simple.
3. Set a Strong Password Create a password that’s hard to guess but easy for you to remember. (Tip: use a mix of letters, numbers, and special characters.)
4. Apply and Encrypt Click Apply, and in just seconds, your file is encrypted with top-tier AES security.
5. Download Your Protected PDF That’s it! Your newly secured document is ready for download. Safe, encrypted, and locked down.
Can I remove the password later? Yes. Just upload the file again and remove or change the password as needed.
Is FacePdf secure? Absolutely. Your files are encrypted during upload, never stored, and deleted immediately after processing.
Do I need to download any software? No. FacePdf is 100% online and works in any modern web browser.
Can I add a watermark as well? Yes. Watermarking is available to further secure and brand your documents.
Pro Tips: Best Practices for PDF Security
If you want to go beyond basic protection, here are a few smart tips:
Always use strong, unique passwords for each document. Avoid reusing old ones.
Never share passwords over unsecured channels like email. Use encrypted messaging apps instead.
Combine password protection with watermarking for enhanced tracking and visibility.
Use secure cloud storage to store sensitive PDFs, and avoid saving them locally on shared devices.
Secure Before You Share
PDFs often carry vital information, and once they’re sent out, you lose control over who can access, share, or modify them. Taking a moment to protect your files isn’t just a smart move—it’s a necessary one in an age of data breaches and cyber threats.
FacePdf makes this process quick, easy, and completely secure. You can upload, encrypt, and download a protected PDF in less than a minute—no installations, no hassle.
Whether you’re sending a business proposal or storing confidential records, don’t leave your documents exposed. Password-protect them with FacePdf and enjoy complete peace of mind.
Start Now: Lock Your PDF with FacePdf
You wouldn’t leave your front door unlocked. So why leave your sensitive files unprotected?
Visit Our Website Now, upload your document, and apply password protection in seconds.
In this competitive world for content writers, productivity is very important if one wants to be successful. Whether you manage a whole content department for a large company, operate as a freelance writer, or are a member of a small team, you must realize that the effectiveness of your content creation will affect your success which is why you need to find innovative ways to save time and increase your work productivity.
Most of the time most writers waste is in the ideation and editing stages. Here in this guide, we are going to discuss some of the ways how writers and their teams can improve their productivity and manage tough and tedious tasks with ease.
So without any delay, let us dive down to the details.
Using Modern Tech for Improving Productivity During Content Creation!
Gone are the days when the traditional tricks used to work in the office. If you are not using modern tech and tools, there is no way you will be able to boost your productivity.
You would be surprised to know that all successful businesses particularly content departments are the ones that rely on AI tools and technologies. If you don’t know how AI tools can help you be productive, let’s explore the different ways they can be helpful.
Converting Raw Thoughts into Solid Ideas
The creation process heavily depends on the idea you have. If you sit down with a vague mind and have no opinion, arguments, or perspective on the topic, there is no way you will be able to write quality content. Writing without proper ideation would only result in a waste of time which is why it is advised that you spend some time on research and data collection.
Today writers have access to AI idea-generator tools that can help them convert their initial thoughts into solid ideas and outlines for content. You just have to enter the word, phrase, or keyword that you have to focus on and ask the tool to generate multiple ideas for content. An idea generator can suggest multiple topics and by providing any topic to a content planner tool, you can get a complete outline.
Providing a Detailed Heading Structure
Headlines are important parts of the content creation process. You must know that without headings and subheadings, there is no way you would get engagement from readers. Today no one is interested in reading content that doesn’t have a proper structure so you need to get relevant headings.
Finding relevant and enticing headings and subheadings can be a time-consuming task. You can easily streamline this task using AI headline generator tools. These tools can provide you with multiple headings and subheadings relevant to the topic you provide. By using these headlines and writing relevant content under them you can easily make your content more engaging.
Generating a Complete First Draft/Sample
Writer’s block is one of the most common reasons why the productivity of most writers gets compromised. If you don’t know where to start or have no knowledge about the topic you have to write on, instead of sitting idle, you can simply use AI generative tools such as ChatGPT and Gemini to get a sample draft.
AI generative tools can easily create first drafts that can be used as references. We have also seen many writers use the content generated by AI tools. Well, AI generative solutions can indeed create logically and contextually accurate content, but this content often lacks human emotions which is important for engaging audiences. For this, it is advised to humanize AI text before using it. This can be done using digital humanization programs.
Editing and Refining Content Quality
As we have mentioned earlier, one of the most time-consuming parts of the content creation process is proofreading and editing. Well once the content writing process is completed, you can take help from online tools for refining and ensuring that the message is clear, concise, and more importantly engaging.
Many cloud-based proofreading solutions can scan your text and highlight human errors in it. Not only can these tools highlight mistakes but can also offer real-time suggestions for fixing them. You can use these suggestions to improve the overall clarity and quality of content.
You’ll be surprised to know that modern AI tools can help you save hours of your time which is otherwise consumed in manual checking and refining of text. Not to mention you can save a lot of your resources and manpower too!
Repurposing Old Textual Drafts
As a content creator, you need to understand that it is impossible to create fresh content on new topics consistently. There is very little left to write about as there are millions of writers across the globe who would be working in the same niche as yours. So instead of wasting your time in coming up with new ideas and information, it is best to repurpose old drafts.
Paraphrasing old content is a good way to produce new content and keep your audience engaged with a mix of old information from a different perspective.
Here is an important thing to note when paraphrasing old content, you need to ensure that it isn’t similar to the original draft, or else you will be accused of plagiarism.
You can take help from an AI paraphrasing tool if you don’t have much experience in rewriting. These tools rely on NLP and other advanced technologies which enables them to revise an existing piece of text in different words without changing intent.
Conclusion
It’s a new world for content creators. Gone are the days when the traditional approaches towards research, writing, editing, and refinement used to work. The competition has increased a lot and if you want to stay relevant and visible to your target audience, you must start employing modern techniques.
AI-powered tools and technology are helping writers across the globe by automating tasks that otherwise require a lot of time and effort. From research stages to paraphrasing, AI tools can help writers save time and improve productivity.
By having the right set of tools you can save a lot of your resources and can guarantee qualitative and unique content creation. In summary, we can say that the key to productive content creation lies in the use of artificial intelligence and digital tools, so you need to stop wasting your time and start leveraging tech!